Showing posts with label Review. Show all posts

20 December, 2016

OPALLAC GEL NAILS AT HOME - REVIEW, TIPS & TRICKS

Opallac is the latest nail innovation promising glamorous salon quality gel nail colour designed to last up to 14 days. The unique Opallac Gel formula glides on like normal nail polish but sets instantly like gel when cured by the revolutionary Opallac LED nail lamp

NO dry time! NO chipping! NO smudges! NO damage!

Today I will be reviewing the Opallac Gel system as well as sharing my tips and tricks to achieve the perfect gel manicure at home. 


THE ESSENTIALS
- WHAT YOU WILL NEED FOR THE PERFECT SALON QUALITY MANICURE AT HOME -
  • 7Watt UV LED Nail Lamp - RRP: $69.00 (AUD)
  • Opallac Gel Base Coat - RRP: $19.95 (AUD)
  • Opallac Gel Top Coat - RRP: $19.95 (AUD)
  • Opallac 2-in-1 Shine & Soak Solution - RRP: $9.95 (AUD)
  • Opallac 30pk Remover Wraps - RRP: $15.00 (AUD)

* There is a Priceline exclusive Starter Kit available that includes everything you need to create the perfect salon quality gel manicure at home. The value pack even includes 3 nail colours. 
It's the perfect DIY kit!
- RRP: $99 AUD (Great value for money!)


APPLICATION
- HOW TO CREATE THE PERFECT GEL MANICURE AT HOME -
1. Prep your nails by ensuring the nail surface is completely clean and free from any oils, creams or chemicals and lightly buff the nail surface.

2. Apply a thin coat of the Opallac Gel Base Coat.

3. Cure the Base Coat for 90 Seconds with the Opallac LED nail lamp.

4. Apply a thin coat of your chosen Opallac Gel colour.

5. Cure the nail colour for 90 Seconds with the Opallac LED nail lamp.

6. Apply a thin second coat of your chosen Opallac Gel colour.

7. Cure the second coat of nail colour for 90 Seconds with the Opallac LED nail lamp.

8. Apply a thin coat of the Opallac Gel Top Coat.

9. Cure the Top Coat for 90 Seconds with the Opallac LED nail lamp.

10. Remove any sticky residue off the nail surface by saturating a cotton pad with the Opallac 2-in-1 Shine & Soak solution, and gently wiping it over each nail for a few seconds.


TIPS & TRICKS 
- THINGS I HAVE LEARNT - 
Nail preparation prior to applying Opallac -
Avoid premature peeling and chipping by ensuring the nail surface is completely clean and dry prior to applying Opallac. Remove any oils, creams or chemicals off the nails with Gel Primer, Isopropyl Alcohol or Acetone and wash hands thoroughly. Lightly buff each nail to remove any ridges and help the gel adhere to the nail for longer wear time. 

Application -
Apply THIN COATS of polish ONE HAND AT A TIME and cure under the nail lamp before going onto the next hand! This will help avoid the polish from pooling at the sides of the nails and ensure flawless application. If pooling does occur, it is important to clean it up before curing your nails under the LED nail lamp. 
I personally recommend curing four fingers at a time (each hand) and the thumbs separately.

Be prepared!
Have everything you need set up, open and ready to be used - this will make the application steps much easier to follow.

Using the LED nail lamp -
There are no tricks or complicated instructions when it comes to using the LED nail lamp. Simply plug it in, switch the lamp on* and you're set. 
It is handy to have a stopwatch or timer nearby to time the 90 second curing intervals to insure the Opallac Gel colour cures properly. 
* There is an on / off button on the back of the lamp.

Ensuring manicure longevity -
Wrapping the nail tips with a swipe of polish helps prevent premature pealing and tip wear. 
Iis important to avoid keeping your nails under hot water for long periods of time 
- while doing dishes or washing, it would be ideal to wear gloves.


LONGEVITY
- HOW WELL DOES AN OPALLAC GEL MANICURE HOLD UP? - 

Opallac promise salon quality colour that lasts up to 14 days.
So I put it to the test...
OPALLAC 'LURE ME AZURE' - DAY 1
Two coats + top coat
I tested Opallac's claim with 'Lure Me Azure' a stunning deep blue holographic glitter gel polish. The polish applied effortlessly and was completely opaque in two thin and easy coats. The picture above swatch was taken on Day 1. So pretty!
OPALLAC 'LURE ME AZURE' - DAY 10
No chipping, minor tip wear + nail growth.
The picture above was taken on Day 10! 
I have never had a manicure look this good in 10 days! I am so impressed! 
I removed the manicure after this picture was taken because I wanted to change it up but i'm sure it would have lasted well over 14 days! Wow!


REMOVAL
- HOW TO REMOVE YOUR MANICURE WITH THE OPALLAC REMOVER WRAPS AND OPALLAC SHINE & SOAK SOLUTION 
1. Lightly file the gel polish on each nail surface for a few seconds to break it down. 

2. Cut to size the desired amount of Opallac Remover Wraps from the 30 pad roll. 

3. Saturate the cotton pad attached to the Opallac Remover Wraps with the Opallac 2-in-1 Shine & Soak solution.

4. Place the soaked nail pads directly over the nail and wrap around each finger separately*  
Keep wrapped around nails for approximately 5 minutes**

5. Remove wraps, one at a time, and peel off the gel colour***

Once the cotton pads attached to the Opallac Remover Wraps get saturated with the Opallac 2-in-1 Shine & Soak solution, they are likely to detach themselves from the actual wrap. 
A second set of hands may be needed to assist with wrapping each nail.

** I personally find 15 minutes to be optimum soaking time.

*** Instead of 'peeling' the gel colour off I like to use a cuticle pusher / orange stick to gently push / scrape the polish off the nail. The Shine & Soak Solution weakens to polish bond to the nail so it easily removes with light pressure. 

If applied and removed correctly Opallac will not damage the natural nail. It is crucial to not attempt to pick the gel colour off. This will cause damage to the nails. 
It is important to follow the Opallac Gel removal process outlined above. 


IS IT WORTH THE INVESTMENT?
- MY PERSONAL OPINION - 

YES! YES! YES!
I pride myself in giving honest reviews and opinions on my Blog, so if I say you need to try something, you do!

I had never tried real Gel polish before and I can honestly say I really enjoyed using it! 

I tend to change my nail polish every day or so due to the fact that nail polish chips on my nails so quickly, but with Opallac I did not experience any chipping or pealing even after 10 days of wear! It's amazing! I removed the Gel polish off my nails because I was I wanted to switch it up not because I felt I needed to! Really, really, really impressed!

Application may seem daunting but it shouldn't be. The wide brush applicator and fantastic formulas make application effortless. The Opallac LED nail lamp does most of the work for you; creating an instantly glossy and dry Gel manicure in seconds. The Opallac system also hardens the nails allowing them to grow and not break. I noticed substantial nail growth when using Opallac, which is an added bonus!

Save time and money with the convenience of an Opallac DIY Gel manicure at home! 
DEFINITELY WORTH THE INVESTMENT!


*  *  * 

Opallac products are exclusively available for purchase online at www.opallac.com and www.priceline.com.au as well Selected Priceline stores nationally (Australia).

*  *  * 

*Disclaimer: Opallac kindly sent me the products mentioned in this Blog Post for an honest review. All opinions expressed are mine based on what I have experienced through trialling these products.


Thanks for taking the time to read this review!
If you have any questions, don't hesitate to ask :)
Have a very Merry Christmas and a fabulous day,
Doni x


Follow me on Instagram for more nail swatch pics & nail art - @donsnailobsession 

31 March, 2015

RIMMEL LONDON VELVET MATTE NAIL POLISH COLLECTION - SWATCHES & REVIEW

Discover a new take and finish on nails. Rimmel London have just introduced the new 'Velvet Matte' nail polish, the ultimate matte collection in the most opulent must-have shades of the season.

Who needs shine when you have nails with real matte-itude?!
Now for the first time, you can get matte Rimmel nail colour all in one bottle - no matte topcoat needed. Watch the formula go from glossy to a smooth velvety matte finish on the nail in seconds.

These Vampy shades are great for autumn / fall and winter - perfect for those of us currently in the southern hemisphere.


All four of these polishes have got really smooth and creamy formulas, are pigmented and cover really well and they're not streaky! 

This nail polish also dries instantly, so you are free to do whatever you want and not worry about smudging or dinting a nail - great if you're in a hurry. 

The colours are all pretty opaque and can be easy one coat wonders depending on how thick your coats of polish are. I found that one generous coat or two thin coats of polish will achieve full opacity with most of these polish colours. 
However, i personally believe to further enhance, build up and intensify the colour to make it look more vibrant ,  two - three thin coats are ideal.


*Tips for best results with application: 
  • You need to be quick with your painting swipes because the polish literally starts drying instantly. I found that  the more swipes of polish you play around with, the more you'll struggle with the formula.Ideally you should use the quick three stroke method of application - these polishes have a fantastic wide bush, so you could even get away with only one or two brush swipes.
Look at that brush!
  • If you are going to apply multiple coats of polish, ensure the first coat underneath is completely dry. 
  • I also found that the polish is easiest to apply with no base coat - the formula can be a little bit tricky to work with if you've used a base coat. The only issue with not using a base coat is that the matte nature of the polish exposes all ridges and imperfections on the nail, but with the more coats of polish you do, the less prominent the imperfections look. 

So...these polishes have pretty awesome formulas, dry super fast, require minimal coats of polish and they're matte - aah-mazing!


 *  *  *  

Here are some swatches of the Velvet Matte range: 

VELVET TOUCH   #013
Velvet Touch is a lovely dark grey nail polish colour. The formula is nice and smooth and the polish is not streaky.The polish colour is highly pigmented and covers really well.  
It takes one thick - two thin coats of polish to achieve full opacity. 
Grey polishes are really 'in' and trendy at the moment, so i definitely recommend adding this to your collection.

SUMPTUOUS RED   #014
Sumptuous Red is a dark crimson-purple-plum nail polish colour. It's a gorgeous colour. The formula is nice and smooth. The polish colour is highly pigmented. 
This polish takes one - two coats of polish to achieve full opacity. I found that the more coats used and built up intensifies the colour, making it look even prettier.
This colour is quite unique and i think an essential colour to have in your collection for autumn / fall.

MIDNIGHT KISS   #015
Midnight Kiss is a beautiful deep blue nail polish colour. The formula is perfect, nice and smooth.The polish is highly pigmented and covers really well. 
This polish takes one - two coats to achieve full opacity. 
This is such a stunning colour that looks great matte, but would also look amazing if a shiny topcoat were added. 

MATTE-ITUDE   #017
Matte-itude is a typical black nail polish colour. The formula is perfect - Nice and smooth and not streaky. The polish is highly pigmented and covers extremely well.This polish takes only one coat to achieve full opacity. 
Who doesn't love matte black nails? Personally speaking, i prefer matte black nails to shiny black nails. 


*  *  *  

If you're not a fan of the matte look, simply topcoat the polish with a shiny topcoat!
But why would you?! These colours look gorgeous matte. 
Matte polish vs adding topcoat and making it Shiny 
*  *  *

The polish only lasts two days or so without chipping and turning a little dull (less matte), that's due to the matte formula nature, so it's to be expected - but it's perfectly fine with me because the polishes dry pretty much instantly when applied, so why not just paint your nails everyday... like i do ;)

I am really impressed with these polishes and their formulas. I definitely recommend you pick up the whole range! 

Cannot wait to see Rimmel release more velvet matte shades!


*  *  * 

Find these polishes at these selected retailers: http://au.rimmellondon.com/where-to-buy-rimmel

RRP: $8.95 each (AUD)


*Disclaimer: CotyPR Australia kindly sent me these products for an honest review. All opinions expressed in this blog post are mine based on what i have experienced by trialing these products.


Thanks for taking the time to read this
Have a great day 
Doni xxx


Find me on:
Instagram ~ @donsnailobsession  - https://instagram.com/donsnailobsession/
Twitter ~ @donsnails  - https://twitter.com/donsnails


08 March, 2015

TOY NAIL POLISH - SWATCHES & REVIEW

Add a burst of colour to your day with TOY nail polish. 

TOY nail polish have great formulas and are highly pigmented, they're super shiny and glossy and are not streaky.

They also dry extremely fast! According to TOY it only takes approximately fifty seconds for the first coat of polish to dry and one and a half minutes for the second coat of polish to dry, with a total hardening time of only seven minutes - awesome!

I tried out some TOY polish manicures for a full week, without a topcoat and it resulted in some minimal chipping and just some general tip wear - amazing! With added topcoat it could even last double the time. 

Some other things you might be interested to know are that TOY cares for you and our planet. TOY nail polishes are not tested on animals and are 100% cruelty free. Their polishes are also 3-Free / free from commonly used toxic ingredients including Dibutyl Phthalate, Formaldehyde, Toluene, Camphor and acetone, and the actual nail polish bottles are made of recycled glass! How awesome is that?! 


*  *  *

Here are some nail swatches of the colours i tried.

ROSADO NEON
Rosado Neon is a bright electric neon pink nail polish colour. This polish covers amazingly well and takes only one coat of nail polish to look opaque, provided you use a thick enough coat, otherwise two thin coats of polish will achieve full opacity - i find that the more coats you apply and build up, the more vibrant the colour looks. 
This polish colour is highly pigmented and has a perfect smooth and creamy formula, which is awesome especially for a neon polish. 
I love how bright this colour looks on the actual nail without needing a white base colour for it to look as bright as it does in the bottle (unlike most neon polishes i have tried in the past). The polish, like most neon polishes, dries semi matte but still looks great. You could go either way with this polish - leave it as it is or top it off with a matte or shiny topcoat depending on your preference. 
It's such a fun and bright colour great for summer.I seriously cannot say enough great things about this polish, definitely a 10 / 10 in my eyes - love it!  

LIMA
Lima is a creamy pastel green-yellow nail polish colour - the colour kind of looks like the inside of an avocado to me. This bold polish is highly pigmented and has a nice smooth and creamy formula. It only takes two thin coats of polish to achieve full opacity. The formula is perfect with even coverage with each coat of polish. 
This colour really has me stumped... it isn't a nail polish colour i would normally gravitate towards but i kind of like it...it just works. It's a colour you could get away with wearing all year round without it being too bright or too dark for a season in the year. 

AZUL CLARO
Azul Claro is an electric neon blue (kind of Aqua) nail polish colour. This polish has a nice smooth formula but appears a little more thin and runny compared to the other polishes - however this was not an issue as the polish applied perfectly, it was just a little more sheer. This polish takes two - three coats to become opaque depending on how thick your application of the coats of polish are. This polish is super glossy, even without a coat of topcoat. I love this colour, it's so vibrant and great for summer and spring to add a splash of colour to your day. When i wore this polish i got so many compliments and i totally understand why - it's gorgeous! 

DORADO
Dorado is a beautiful gold metallic nail polish colour with silver shimmer running throughout it. This polish has an amazing smooth formula that glides onto the nail. It only takes two coats to achieve fully opacity. The polish covers evenly with the two coats of polish with no issues of streak marks or patches. 
I'm a sucker for metallic polishes so i've tried a lot of them, but this has one of the best metallic formula's i have ever tried - i love it!
This is a great polish colour to add some bling and shine to your day. By even just painting one accent nail with this polish, it will surely add some sparkle to your day.

DIAMOND COCKTAIL - SHINY TOPCOAT 
Diamond Cocktail is a gel-like shiny topcoat...it actually is really shiny and glossy.  
This topcoat is so smooth and effortlessly glides straight onto the nail. One coat of topcoat applied to any manicure sets the colour, smooths the nail, assists in the longevity and wear of a manicure and provides instant shine. It is super glossy which i absolutely love and dries incredibly fast. Once your base nail polish colour has dried, the topcoat won't smudge any nail art or pick up the colour, creating the perfect shiny manicure. 
Your nails will literally glisten like a diamond - love love love it and definitely recommend! I've found my new go-to topcoat. It's just perfect!

* all nail pictures featured in this blog post are topcoated with this topcoat *  

*  *  * 
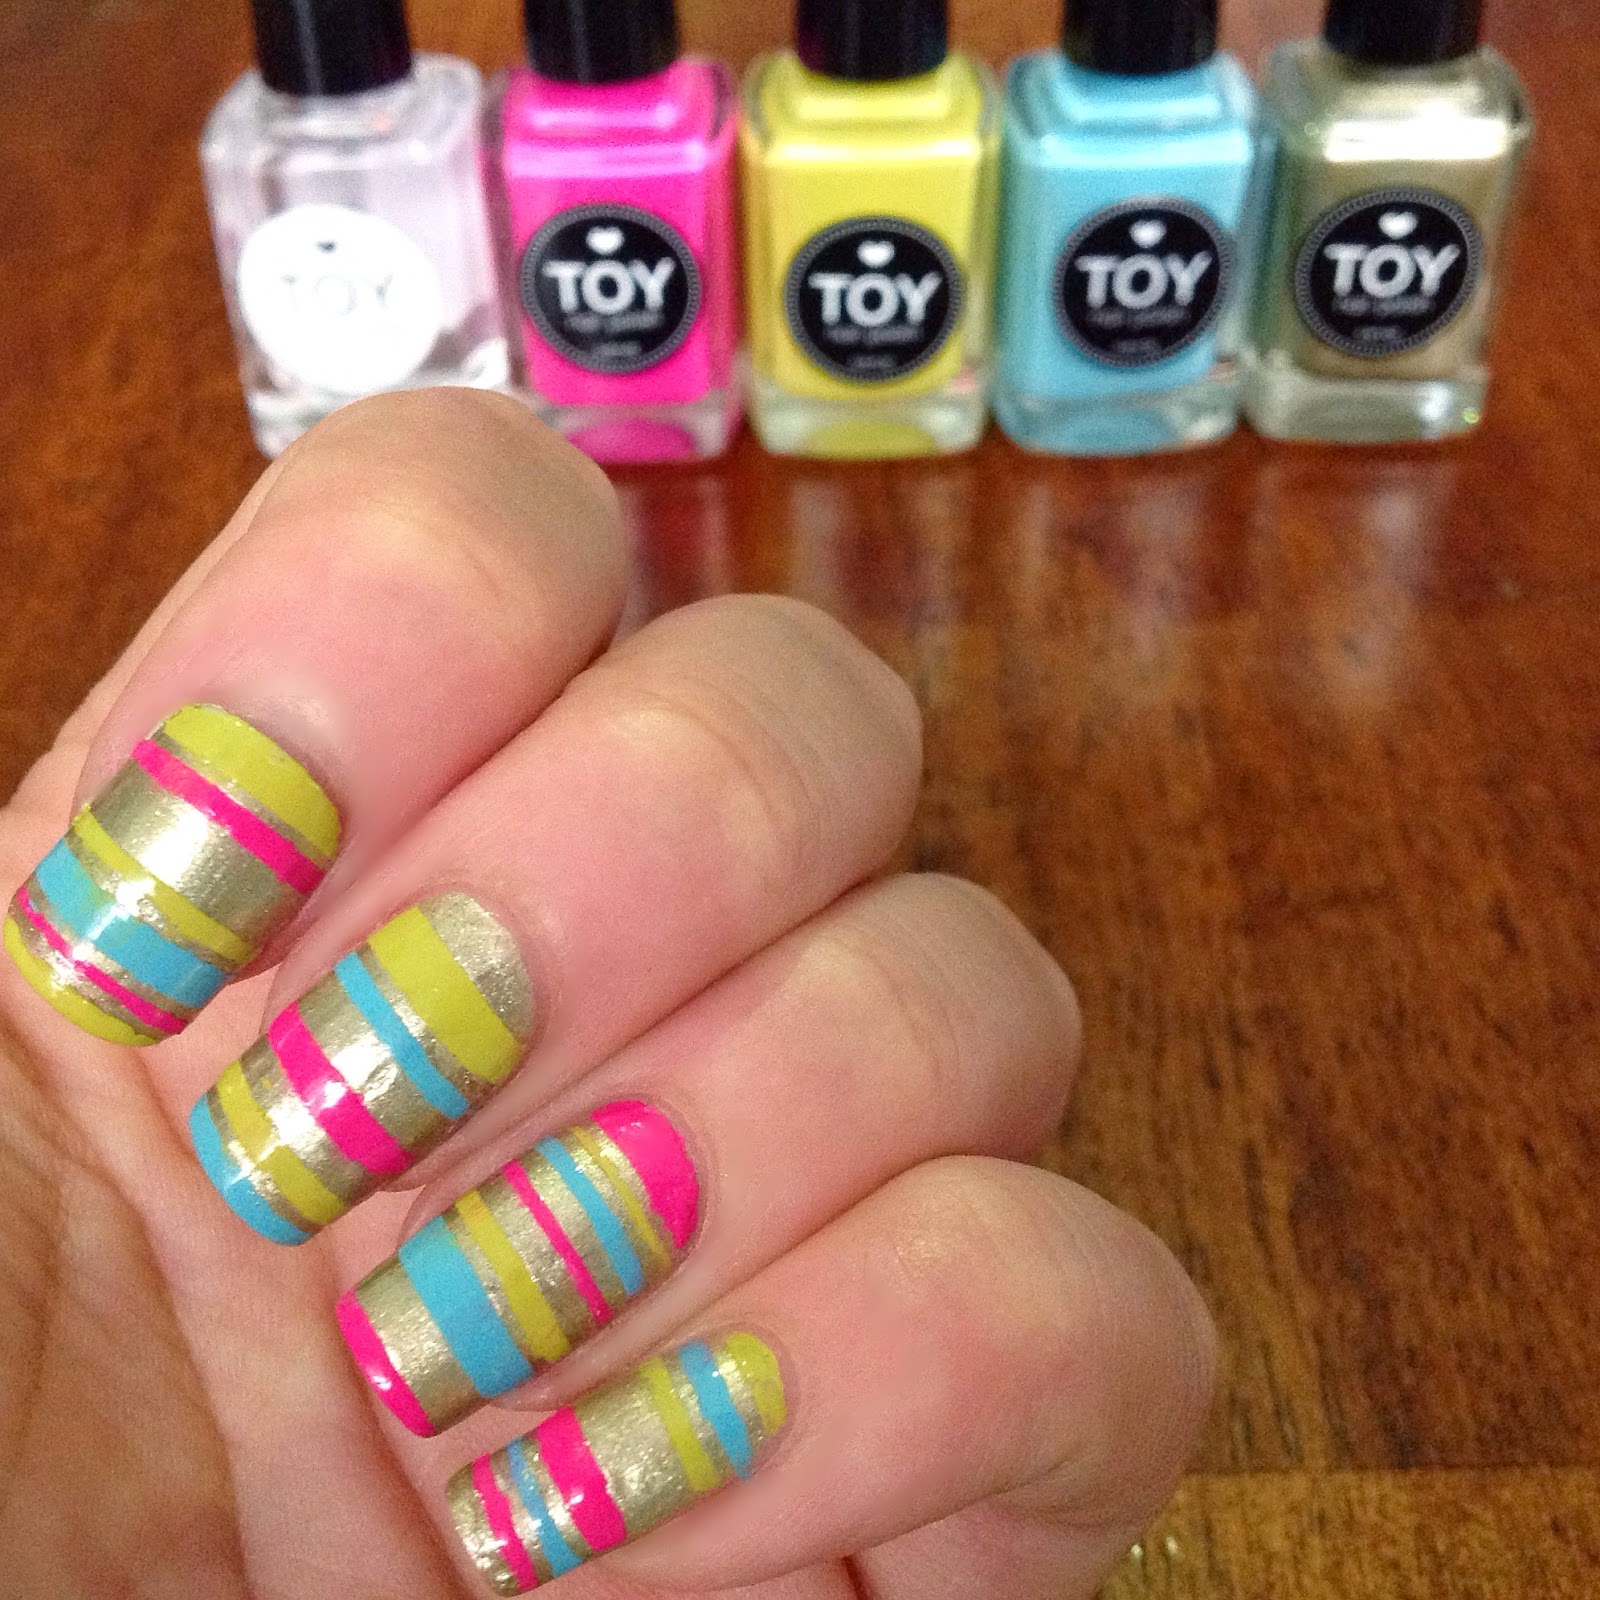
Here is some nail art i did using my new TOY's... 
  
*  *  * 
I'm seriously impressed with the quality of these TOY polishes and definitely recommend you check them out!

Find these polishes and more here: http://toynails.com.au/
* * * Use my code "trytoy20" for 20% off your order * * *

TOY currently have 19 nail polish colours and 2 topcoats available on their Australian online store. I'm looking forward to more colours being released as well as many more great things coming from them in the future. 
Connect with TOY on Instagram and Facebook for news, tips and inspiration -@TOYnailsAU

Peace.
Love. 
TOY nails

Disclaimer: The products mentioned in this blog post were kindly sent to me by TOYnailsAU for an honest review. All opinions expressed in this blog post are my own based on trial through manicures i have created with the products.

Thanks for reading
Have a great day
Doni xxx

Find me on:
Instagram ~ @donsnailobsession - https://instagram.com/donsnailobsession
Twitter ~ @donsnails - https://twitter.com/donsnails